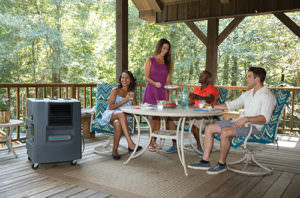
As we shed our layers and get reacquainted with the sun, it’s time to prepare your evaporative cooler for the warm days ahead. While your Portacool cooler was in hibernation, it could have collected dirt, dust, and debris that must be removed for max cooling efficiency. We recommend the following steps to make sure your evaporative cooler is ready to tackle the summer heat.
Step 1: Remove your portable evaporative cooler from storage and uncover the product. Guarantee it is unplugged and any water is emptied out of the reservoir by unscrewing the drain located at the bottom or back of your product.
Step 2: Once the water is drained, the Kuul Control Comfort™ evaporative media can be removed from the back of the cooler to allow cleaning of the tank. To access this area, you’ll need a Philips head screwdriver. If you have a taller model such as the Jetstream 250, 260, or 270, you may need a ladder, as well. Proceed by removing the screws from the media flap on the top of the evaporative cooler and sliding the media out. You may want to review this video to see exactly how this is done.
Step 3: Once the evaporative media is removed, rinse out and thoroughly wipe clean the inside of the reservoir. Make sure it is dry before moving on to the next step.
Step 4: Check your Kuul Control Comfort evaporative media to confirm it is in good condition for the upcoming heat. Kuul evaporative media is designed and manufactured to be the longest-lasting evaporative media on the market, but it is important to keep it in tip-top shape as it is the most important part of the evaporative cooling process. Some signs that you may need to replace your evaporative media include sagging or softened media, increased static pressure, damaged media, loss of cooling, or reduction in wind speed. You can check out this blog for more details.
Step 5: Replace the Kuul Comfort evaporative media using the directional stickers for correct installation and secure the media flap with its respective screws that were removed.
Step 6: Find the location you’d like to set up your cooler and fill with water (either through the manual water fill or by hooking up to a hose). Plug in the electrical cord, verifying it won’t cause any tripping hazards, and turn on the pump and fan to start feeling the cooling effects.
Step 7: Once you’ve ensured your cooler is working properly, you can move it where you need the most cooling! Simply roll to the chosen location, fill it with or connect to water, plug the cooler into a standard outlet or generator, and turn it on. Make sure to lock the heavy-duty casters when it’s not in motion so cooling stays right where you need it.
Now you and your cooler are ready to take on the heat! If you have any questions while prepping your cooler for the season, reach out to one of our world-class Portacool customer service representatives by filling out our online form, through the chat feature on our website, or by calling technical support at 800-695-2942.